Photos: Bacon Fatte
Churn up sweet and savory butter and cheese board recipes for your next gathering.
Butter boards. There. We said it. You’ve seen them all over social media and likely on a host of cooking segments on TV. Is it really worth spreading butter all over a serving board or dish? Is the greasy cleanup worth the hype? In a word—yes.
Michele Phillips, one of our Editorial Advisory Board members, inspiring food blogger and talented photographer, has developed some ideas for us all to dip our culinary hands into … in the most buttery and delightfully cheesy ways.
To get started, Phillips recommends creating boards with a theme. “Include lots of ways to enjoy the butters or spreads versus, for example, just one bread to spread it on,” she says. “People love lots of flavor combinations and options.”
Food safety is priority. Phillips reminds us to use clean, sealed, food-safe boards or platters. “Avoid decorative, textured surfaces or those with cracked or chipped finishes,” she says. “Porous wood surfaces will soak up fats and food stains.” For good measure, line the surface with parchment or plastic wrap if needed. “This can be a little clumsy, but it helps,” she says.
What are the first steps?
Phillips notes that recipes can be adapted, flexing as the occasion unfolds or guest list requires. Regardless of the recipe, she recommends making the board easy to serve and enjoy by ensuring the toppings are uniform in size and the ingredients are spreadable and in bite-sized pieces.
“Accommodate those with different dietary needs or flavor preferences by placing some of the toppings in sections rather than scattering them all over the butter or spread, or place ingredients in individual serving dishes. Guests can top their breads as they wish,” Phillips says.
How far in advance can one create a board?
“The best thing about butter boards and spread boards is that everything can be made in advance and assembled shortly before serving,” Phillips says. “Butters and spreadable cheeses, ideally, need to be softened at room temperature before you can mix, whip or spread them. If needed, cut or grate butters and cheeses into smaller pieces, so they soften more quickly. Then add mix-ins, like citrus, herbs and spices, etc., and combine per recipe instructions.”
“Once the ingredients are combined, you can store the butter/spread one of two ways: First, place the infused butters or spreads into a covered container, and refrigerate until ready to use. Secondly, spread the infused butter or spreads on your board or platter, then cover the whole thing with cling wrap, and pop it into the refrigerator. When you’re ready to assemble the rest of the ingredients, the butter/spread will already be in place. It’ll soften as you go and be ready to serve when your board is complete.”
How long should boards be out of the refrigerator?
“Butter, cream cheese and most soft cheeses will take 30 minutes to an hour to soften, so you can work with them,” Phillips says. “Beyond that, cream cheese and other soft cheeses are best within two hours. Butter boards and the like are generally presented for (and consumed within) short periods of time. When planning board(s), carefully consider the number of guests and room/space temperatures. Also, keep in mind that boards can often get messy, so you may want to consider making more than one smaller scale board for entertaining.”
Salted or unsalted butter? What about fat content?
“Generally, sweet cream butter, either salted or unsalted, is best for butter boards,” Phillips says. “Choosing salted or unsalted butter depends on serving preferences and/or dietary restrictions (i.e., low sodium diets). Salted butter has more flavor, which also enhances the flavors of both sweet and savory add-ins. Salted butter lasts longer in general because the salt acts as a preservative. The fat content of most American butters is about 80 percent, which works perfectly well for butter boards. Use your favorite butter or whatever you use at home.” Note: Butter blends or spreads might include oils or other ingredients that can be unstable at room temperature. Test them in advance to make sure they’ll hold up.
What about leftovers?
“Flavored/compound butters can be re-refrigerated [up to a week] and frozen for later use,” Phillips says. “And, they can be added to recipes and other dishes with similar/complementary flavor profiles. Sweet butters can be spread on toast, French toast, pancakes, Dutch babies or German pancakes, waffles, crêpes and more. Citrus butters are wonderful with vegetables, chicken and fish, pasta and rice. For herb butters, use [it] to cook and flavor beef, pork and other proteins, as well as vegetables, pasta and rice. Cheese spreads, like the whipped goat cheese, is wonderful when tossed with pasta or rice or added to baked potatoes. Like savory butters, it’s also good with grains like farro or quinoa.”
What about the naysayers?
“Some contend that butters and spreads should just be served in a bowl because it’s easier,” Phillips says. “While that may be true, it’s hard to deny the wow factor of a board—especially for entertaining. Even for casual family meals, a small board with soft, spreadable cheese, some fresh herbs and bread lets us serve something simple in a special way—and that’s what it’s all about.”
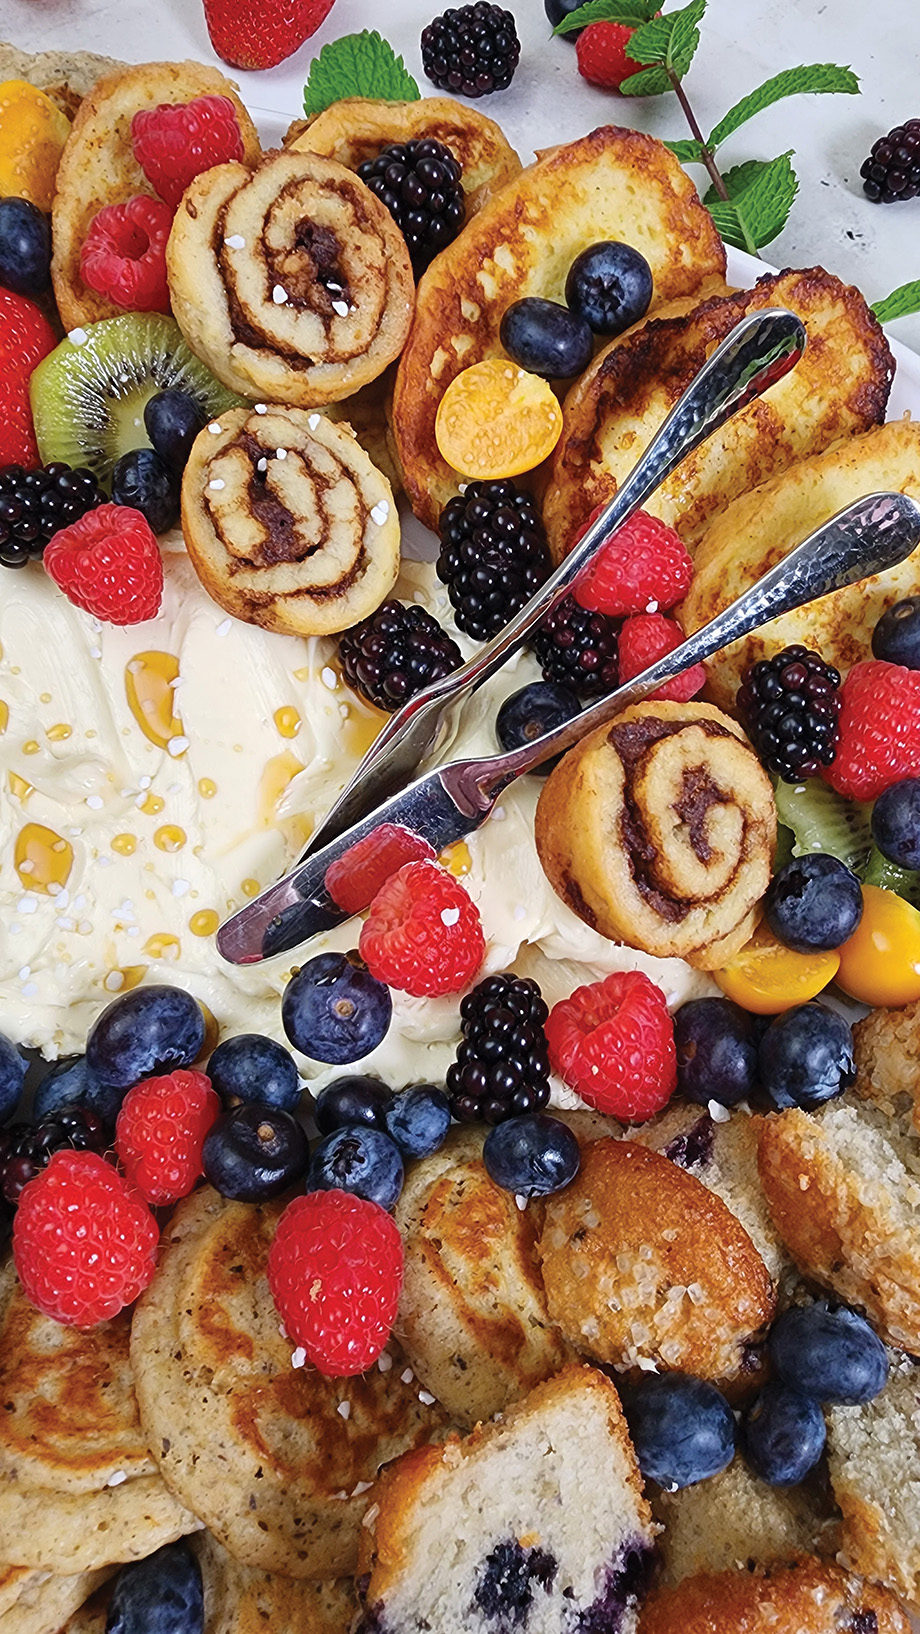
Breakfast boards replete with toasty offerings, a lineup of fruit and sweet cream butter dressed with maple syrup is our ideal way to start the day.
Whipped Maple Butter
contributed by Michele Phillips
- 1 cup sweet cream butter, softened (salted or unsalted)
- 2–3 Tbsp. maple syrup, plus more to taste and for serving
Place softened butter in a mixing bowl. Using a hand mixer on low, whip the butter for one or two minutes. Add 2 Tbsp. maple syrup. Increase mixer speed to medium, and mix an additional two to three minutes until butter is light and creamy. Add up to 1 more Tbsp. (3 Tbsp. total) for sweeter butter, and whip to combine.
To Serve: Spread room temperature Whipped Maple Butter on a board or platter. Surround the butter with mini French toasts and pancakes, fresh fruits, breads, muffins, etc. Drizzle more maple syrup and some pearl sugar over the butter just before serving.
Toppings and Serving Suggestions: Consider blackberries, blueberries, golden berries, raspberries, kiwi, fresh basil, mint, maple syrup drizzle, pearl sugar and mini French toast. Save time with tasty store bought sweets and breads. Feature bagels, crêpes, croissants, English muffins, popovers, quick breads, soft flour tortillas, toasted baguette slices or waffles—anything that goes well with butter and maple syrup. Get saucy! Include sauces and jams, like raspberry coulis, sweet blueberry sauces and tart strawberry jam on your boards.
Mini French Toasts
contributed by Michele Phillips
“We prefer less sweet flavors in our house, so I don’t add sugar or vanilla to my French Toast batter when serving with fruits and sweetened butter. If you like things sweeter, go ahead and add them!,” she says. Note: This recipe can be halved or doubled.
- 1 loaf French bread, about 20–24 slices, 1/2 to 3/4 inches thick
- 6 eggs
- 2 cups whole milk
- 1–2 tsp. granulated sugar or other sweetener of choice, optional
- 1–2 tsp. vanilla bean paste or extract, optional
- 4–6 Tbsp. butter for pan, plus more as needed
Warm a nonstick skillet over medium-low heat. Melt 1 Tbsp. or more, if needed, to coat the pan. Note: Do not allow the butter to brown or burn. If it burns, carefully wipe the pan clean (Paper towel clamped in a kitchen tongs works well.), and start over by melting a fresh pat of butter. Working in batches, take four to six bread slices (Don’t overcrowd.), and soak them in the egg mixture. Allow excess batter to drip off before placing in the pan to cook. As soon as butter is melted and covers the surface of the pan, place the custard-soaked bread in the pan. Cook for about two minutes or until the bread firms up and the bottoms are golden brown. Flip the slices; cook the opposite sides. Between batches, carefully wipe the pan clean (use paper towel and kitchen tongs). Melt a fresh pat of butter, and repeat the cooking process until you’ve used up all the batter.
Keep Warm: Place the cooked toasts in an oven-safe pan covered with foil in a preheated 200˚F oven to keep warm until ready to serve.
Store: If not serving right away, cover and refrigerate the French toasts overnight or up to two days. Toasts can also be frozen for two to three weeks. (Use heavy duty freezer-safe zipper bags).
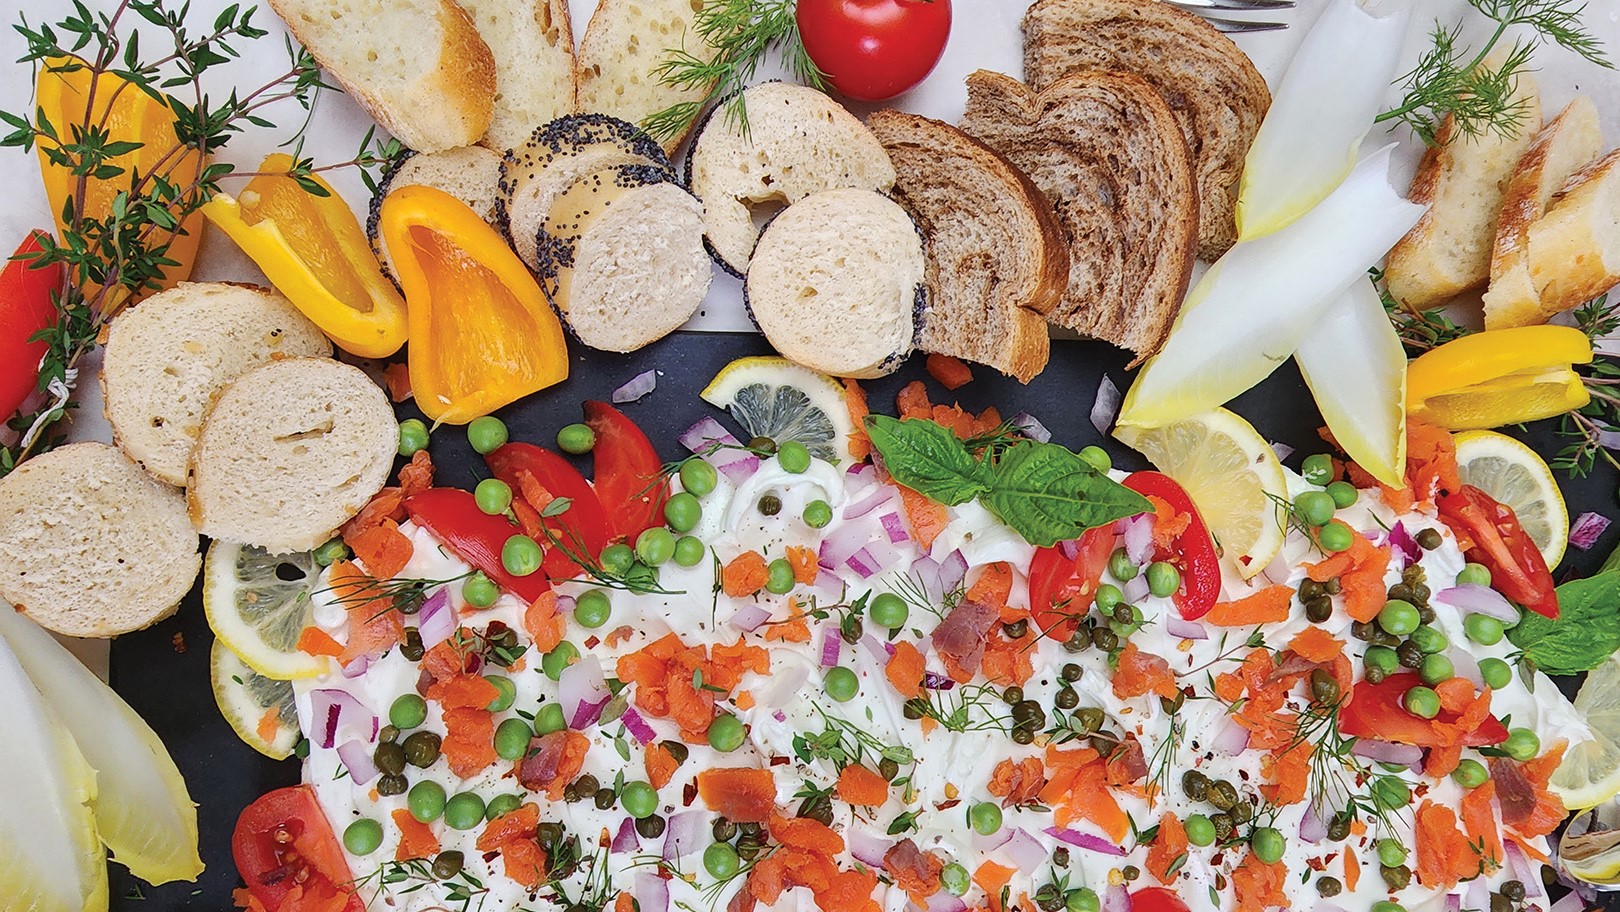
Whipped Goat Cheese
contributed by Michele Phillips
- 8 oz. plain goat cheese, softened
- 8 oz. cream cheese, softened
Place softened goat cheese and cream cheese in a mixing bowl. Using a hand mixer, whip the cheeses together until well combined (2–3 minutes). The texture will be visibly lighter when it reaches the whipped stage. Scrape mixture from the beaters (or food processor) into a mixing bowl. Using a flexible spatula, stir in* the ground pepper, fresh lemon zest, and/or finely-chopped fresh herbs. Alternatively, you can sprinkle* the pepper, lemon zest, and/or fresh herbs on top of the spread.
To Serve: Consider using: bagels, sliced into rounds; fresh endive; mini peppers, halved and deseeded; pumpernickel swirl bread, cut into squares; and seed bread, cut into strips. Additional suggestions include: crackers and toasted breads; fresh vegetables; horseradish or fig spreads; and nuts.
Toppings: The following ingredients are featured in the board pictured on page 52, but all are optional: capers; cherry tomatoes, quartered; English peas; fresh herbs, finely chopped; lemon wedges and zest; multicolored or black pepper corns, freshly ground; red onions, finely chopped; and smoked salmon, finely chopped.
Herb Garnishes: In addition to topping the whipped goat cheese spread with finely-chopped fresh herbs, use full stems and sprigs of herbs as garnish. Bundle herbs (thyme or rosemary)
into bouquets with kitchen string.
*Gently folding or stirring in fresh herbs, lemon zest and pepper into the whipped cheeses distributes the ingredients and flavors the mixture without smearing them, making for a cleaner appearance. Alternatively, top the whipped cheese spread with said ingredients to also ensure a cleaner looking spread and layers the flavors.
baconfatte.com
Facebook: Bacon Fatte
Instagram: @BaconFatte
Twitter: @BaconFatte
Pinterest: BaconFatte